Time-Lapsing thru Europe
Human validation
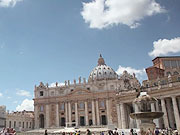
This is a time-lapse video I shot while traveling thru Europe earlier this summer - such an exciting project to work on. This was definitely what I was looking forward to working on and completing the most from all the shots I took during my Europe trip. My original goal was to shoot at least 1-2 sequences in each major city I was in – which I was able to do. In total, my time-lapse images added up to just about 48.5 GB and 7,200 exposures. Before I left, I’d researched a few of those portable hard disk memory banks which you can offload a memory card onto, but because of mixed reviews, I decided to just use multiple memory cards. A brute force and somewhat expensive measure (compared to some alternatives), but it worked well.
EQUIPMENT:
- SLR (Canon 5D2)
- 24-105mm/F4.0 L Lens, Canon
- Intervalometer (Generic one, roughly $40 – as opposed to Canon’s that is ~$160)
- Tripod (SLIK F740)
- Memory cards (~120GB)
- Cokin square filter holder & graduted ND filter
- Circular polarizer
SETTING UP & FILMING:
After deciding on a location, I would go ahead and set up my tripod and camera and take several test shots, tweaking the settings until I got the exposure to where I wanted it. My main goal for all the time-lapse sequences was to get the shutter speed to be at least as slow as 1/15th of a second – which enables the final resulting video to have a smooth rather than “choppy” look to it. During the day this was difficult sometimes, so I would often need to combine my Cokin ND filter with the polarizer. This would cause a good amount of vignetting, but this wasn’t a huge problem because with the software that I use to compile the sequences (Adobe Literoom and LRTimelapse), the resulting image is cropped at a 16:9 ratio, which cuts the top and bottom strips off, leaving no vignetting in the final video (in most cases). Even though I could theoretically decrease the aperture all the way, I didn’t want to go past F11/13 or so to avoid every single speck of dust on the sensor showing up in the final video – which happens all the more easily where there are large portions of blue sky, etc. The last thing to decide would be the interval – the amount of time between each exposure. In most areas where there was a lot of movement (boats on a river, people walking down a street) I would just set it at 1 exposure/second – probably don’t want to go any slower than this to keep that smooth look. The generic intervalometer I had couldn’t go faster than this anyway.
I’d aim to get about 20-30 seconds of video in each sequence – which usually translates to 600-900 shots (@ 30 frames/second, which is the setting I use when compiling the video – others may use 24/25 fps). At 1 exposure/second, 900 exposures would take 15 minutes – and then I’d pack up and move on to the next location. Once you get the procedure down, it becomes quite natural going from place to place, shooting 10-15 minutes in each place.
POST-PROCESSING:
I use Adobe Literoom and LRTimelapse in conjunction to compile the final video together. Both programs work in conjunction to compile the final video. LRTimelapse calculates all the transitions from exposure to exposure, adds any pans that you designate, and helps get rid of some ‘flicker’ that you may have in some of your sequences. Literoom puts the final video together, pulling data from LRTimelapse regarding the transition from shot to shot. In my experience, flicker is always greatest when you have large portion of the sky in your shot. If you google LRTimelapse, you can download it from the creator’s website and find various specific workflow descriptions with step by step instructions on how compile your final video. This is the step that took me the longest – actually compiling all the sequences. An average 30 second sequence would often take 30 minutes or so to compile on my Macbook Pro.
After I had compiled each individual sequence, I used iMovie to put together the final time-lapse video, importing all the major sequences, adding music, transitions, titles, etc. This part was the most fun for me as I was able to get a feel for how the final product would look.
When choosing music, I didn’t want to infringe on any copyright laws etc, so I did some research and picked a piece called ‘Scorpio’ by English composer Simon Wilkinson (thebluemask.com). The famous time-lapse video ‘Dakotalapse’ by Randy Halverson features some of Simon Wilkinson’s music as well. I was able to download the piece from Simon Wilkinson’s website (thebluemask.com) as well as a license for its use. If you’re looking for other sites from where you can get music without infringing on copyright laws (royalty free, or with appropriate license) the few sites below may be of some help:
royaltyfreemusic.com
thebluemask.com
youlicense.com
So, that describes my general time-lapse workflow in a nutshell. Feel free to share any TL videos of your own – seeing other people’s work is always a huge motivation to go out there and film more, learning and improving as you go.
Blog-post on time-lapse details: uzcpictures.wordpress.com/2012/08/04/europe-time-lapse-video/
Music: "Scorpio" by Simon Wilkinson
(Music & Licenses available at thebluemask.com)

